Friday, April 29, 2016

Post # 2 : Cute Panda Card !!

Hi ..Welcome to the Second post of the day...Sharing a cute panda card for an adorable friend !!
You can Check the First Video Tutorial post Here & 3rd post Here & 4th last post Here !!


Steps On Making this - 

1) Took a White CS n then using Dotty Lines Mini Stamp created a white heat embossed background.
2) Distress the BG with Candid Apple & Abandon Coral DI using heat emboss resist technique.
3) Stamped the cute Panda From Our Exclusive Cute Critter Set on Neenah white CS. then Colored it using water-coloring pencils & fussy cut it !!
4) Put it on a wood grain circular panel which is layered with a Vellum Scalloped Circle.
5) Stamped the Sentiment from Bold Love 'N' Hugs Stamp set ..loved the way we can club so many different words to create one perfect sentiment from this stamp set.
6) finally added a twine (RAK By Pooja ) through a punched hole and place it on the embossed bg panel using 3D foam tape for more interest !!
7) Yay..its done..simple !!


Stamp Sets & Vellum Used from Peek-a-boo Designs are - 

1) Cute Critter Set (Exclusive)                            2) Bold Hugs 'N' Love         


3) Dotty Lines Mini Stamp                                       4) Vellum - 12*12


Thanks for stopping by - 
hugs 
Entering this card to --


(Chose colors : Poppy Seed & Lollipop)


Post # 3 : Thanks Card !!

Hello ..this is the third post of the day ...Sharing a CAS card ...!!
You can Check the First Video Tutorial post Here & Second card post Here !!


 Steps On Making this - 


1) Took a Water coloring CS n then stamped Roses & Leaves using Flower In A Jar Stamp.
2) Colored all the Flowers & leaves using water-coloring pencils & fussy cut all !!
3) Put a piece of beautiful PP at some diagonal overlaying the golden paper strip on a Neenah white Card Stock.
4) Stamped the Sentiment from the same Flower in A Jar Stamp set ..& added some Black stones here n there for final touch-up..!!
5) Loved the way it turn out..simply  beautiful :)


Stamp Set & CS Used from Peek-a-boo Designs are - 

1) Flower in A Jar                                               2) Golden Card Stock 12*12
Don't Forget to hop to my last post Here !!

Happy Crafting
Hugs 

Linking this card to -


(Followed the Sketch)


(Style : Clean & Layered )
(Inspired by the flowers & Green Color)

Post # 4 : Friends are flowers !!

Hii Friends ..Last card of the day and my most favorite too ;p This one turned out so elegant and i am totally loving it...Dedicating this card to all my Blogger crafty friends ..Thank you for being in my life :)
You can Check the First Video Tutorial post Here, Second post Here & Third Post here !!


Steps On Making this - 


1) Took a vellum First of all n then Golden heat embossed all Roses & Leaves using Flower In A Jar Stamp.

2) Colored all the Flowers & leaves using Nirmal water-colors & fussy cut all !!
3) Took a Mint CS and stamped the Stripes from Its Plaid Time Stamp Set in same mint color pigment ink using Tone-on-Tone Stamping Technique !!
4) Heat embossed the sentiment in gold from The Lily Hope Stamp set on vellum banner !!

5) Then Splatter some Golden & Blacks inks for extra texture and look :) 

6) Cut a frame from Golden Card Stock ..placed it in center then arranged the vellum flowers & leaves around it & then the sentiment banner !!
7) Then added some Black & Golden Sequins also here n there for final touch-up..!!
8) I just loved this card ...not looking like made by me ..lol...but this one is my favorite from all above cards ;p


Stamp Set & CS Used from Peek-a-boo Designs are - 


1) Flower in A Jar                               2) Its Plaid Time                          3) Lily Hope


 4) Vellum - 12*12                                                         5) Golden Card Stock 12*12 


All Three Cards ---


Have a Nice Day ..Hugs 

Linking this Card to the --


(Followed Theme - Stamps & Splatter of Black & Golden Inks )


(Style - Classy & Elegant)

(Inspired by the flowers & Green/Mint Color)


A Baby Boy Themed Pop-up-Box !!

Hii...I am super excited as i am sharing my very first Video Tutorial on how to make a Pop-up-Box :) Made this one for a dear friend to wish her congratulations on blessed with a cute baby boy!!

( Please bear my tiny mini mistakes in the video ;p )

This is what i made for my tut post -- A Baby Boy Themed Pop-up-Box !!


Check out the Video --


Don't Forget to Check My cards Here , Here & Here ;p
Sneak peak --


So..Did you enjoyed the video ..I hope you liked it !!

Thank you for watching ..Hugs ..


Linking this box card to - 


4) Time Out Challenges # 55 (Lots of Fussy Cutting involved & made for one dear friend for her newly born baby boy--Celebration)


Wednesday, April 27, 2016

Love themed Journaling Diary !!

Hii...Back again with the DT Post for Decorate To Celebrate Challenge # 9 :Anything-goes !! Hop over to the challenge blog for all the details :)


I am sharing a custom made Love themed journal-ling Diary which i made long back on request by a friend but totally forget to share here ;) 
One of my friend wants to pen down all her feelings while her fiance was in Europe so i came up with this Colorful Diary with minimal embellishments & lots of space for journaling & to put photo as well !!

Here it is --


First Page with Pocket & two Tags - 


Tags For Journal-ling & to put Photos at back side - 


 Dont wanna make the post photo heavy so collagen all the pages ---


and last but not the least ..back cover --


That's all for today ...Hope you like it !!

Thanks & hugs --


Wednesday, April 13, 2016

A Purse Baby Album !!

Helloooo everyone ..... Hope u all are doing well ...!!


And today I am sharing a purse album which I made to gift to a very cute baby girl Kayra !!
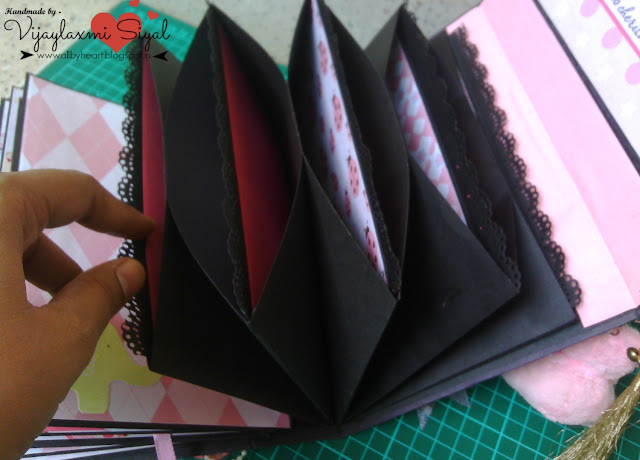
This album have 6 interactive pages for photos and it have some accordion pockets also ..which are very much in trend now !! I combined both together in this album ;)
i am trying Hidden Hinge Binding & Accordion Fold Pockets first time so bear me ...& I hope u all like my experiment ..I kept album very simple as the Papericious pattern papers are more than enough to create a beautiful creation :)

Here it is ..


Let's open it ---


Here are the Accordion Pockets with photo mats --


 I Just love this cute tassel with a super adorable Pink Teddy ( So apt for little girl) --


Back of the Purse Album --


Thanks for stopping by ---

Hugs --

Entering it to the following challenges -

1) Papericious Monthly Challenge # 1 (Used It's a Girl Paper Stack From Papericious)